Corn Hole Boards
For my semester final project, I will be constructing Corn Hole Boards. I need to use 3 tools minimum from the innovation center. To use 3 tools for my project, I will 3D print a handle for the boards, use the CNC Router to cut a hole in my boards, and use the laser to engrave a design to my project. The following is documentation from start to finish of the project.
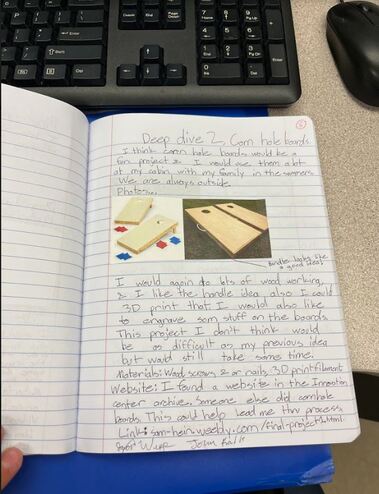
These were my intial ideas for the corn hole boards, as well as my "Deep Dive" I did. Which was the research I did before making this project.
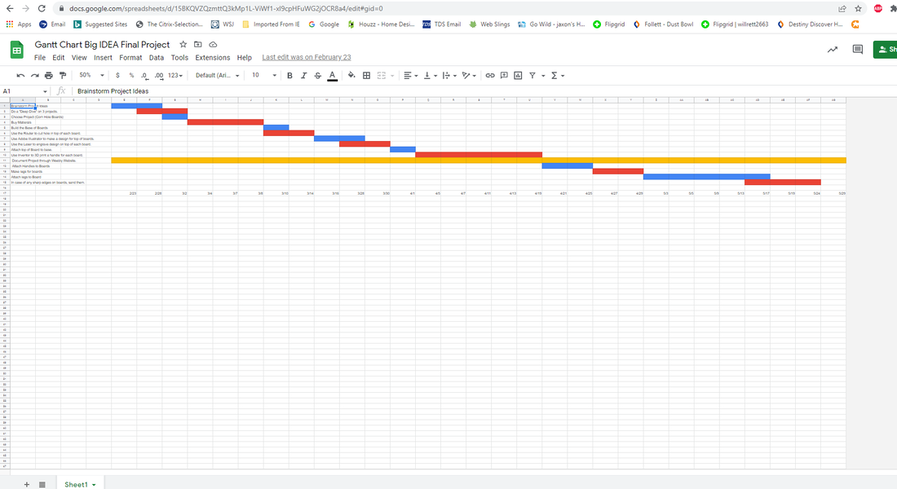
This is the Gantt chart I created in class. This chart gives me a timeline, to help me keep on track, and focus on what tasks I need to complete next throughout the semester. The length of each bar, shows how long each tasks takes, and when it should be completed by. Its also a good tool to use to make sure everything I wanted to do for the project, was completed.
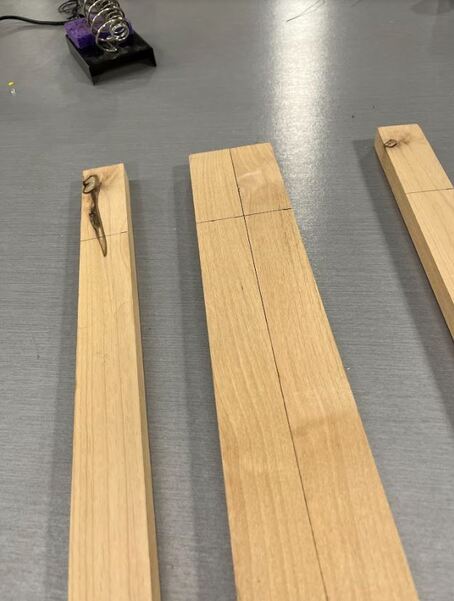
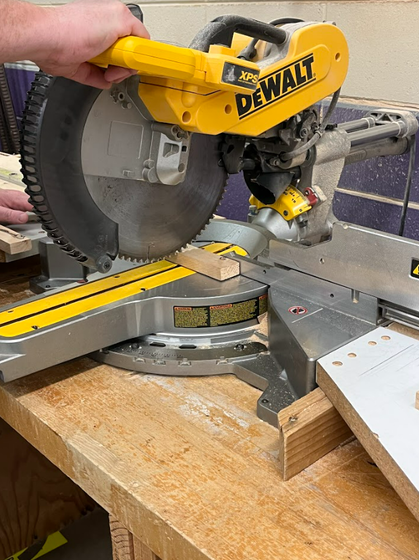
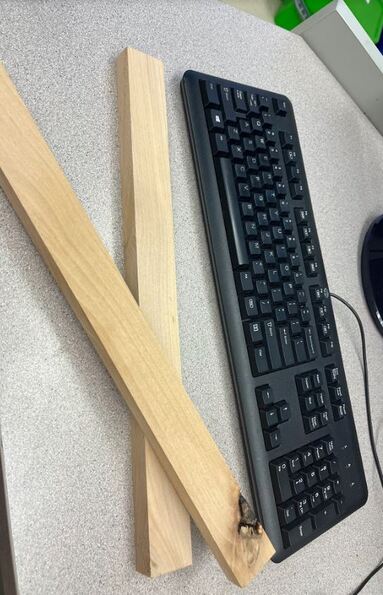
The first thing I did was draw the correct dimensions on my wood I bought to build the boards. I need the dimensions of the boards to be 18"x32" to fit in the laser, so I can engrave a design on the corn hole boards. After this, I can get these cut in the wood shop.
|
|
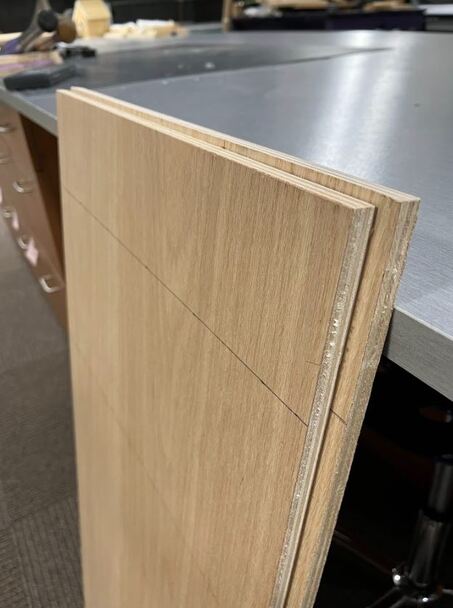
Next, I got the wood cut in the woods shop. I have not taken a woods class since 7th grade Tech Ed, so thanks to Mr. Willeaur for helping with this.
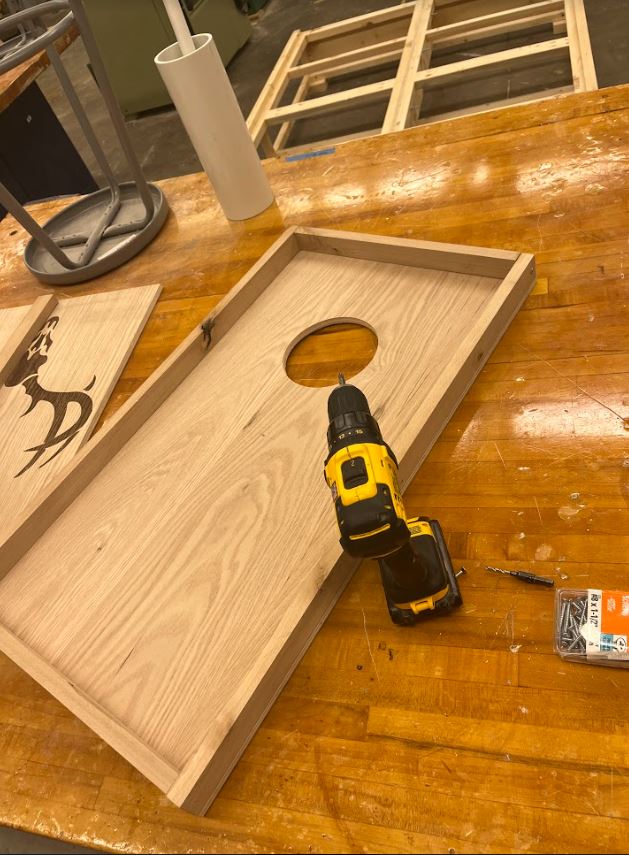
Continuing, I then used the my wood, to build the base of my boards. I screwed the wood together using the drill to make both the bases. The picture on the left is mid way thru building the bases, and the image on the right is the final bases.

|
|
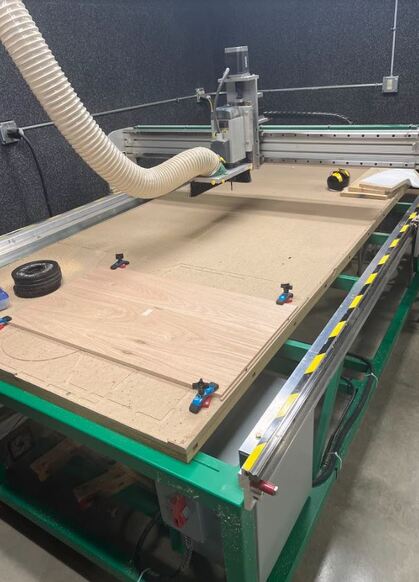
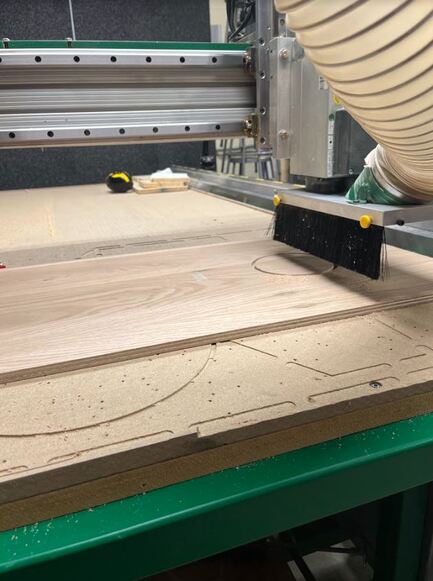
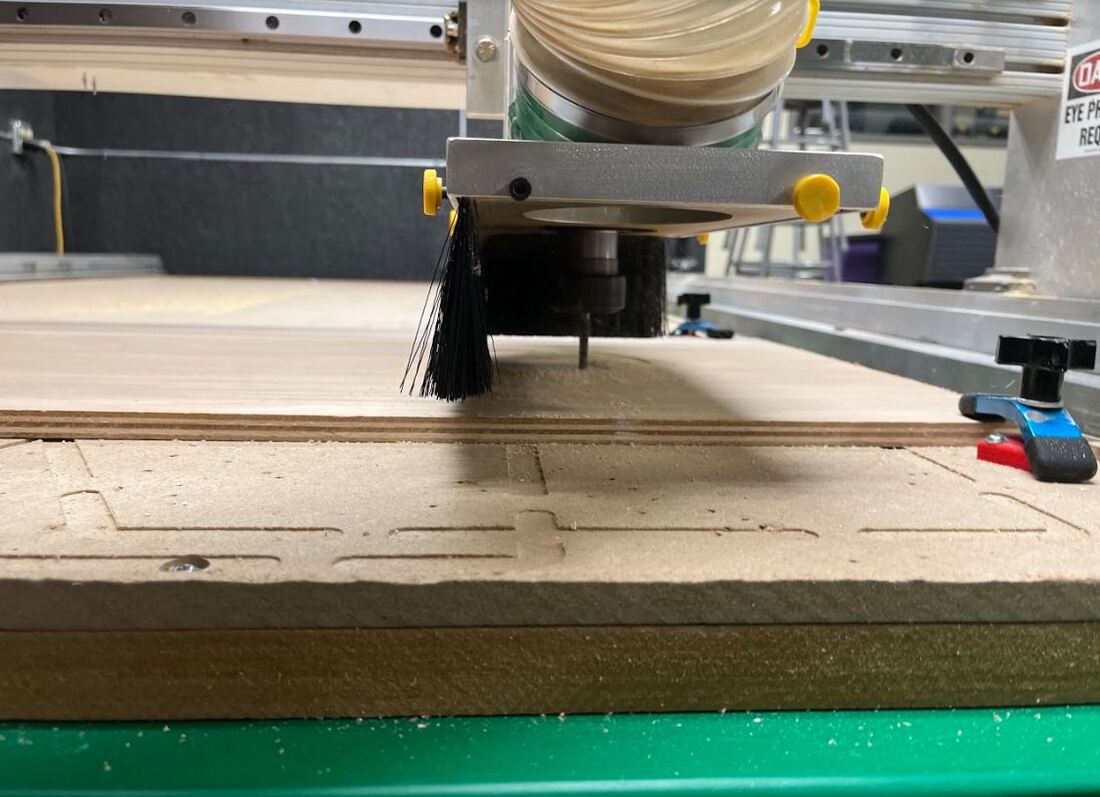
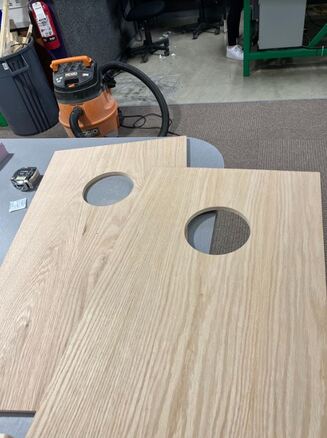
The next thing I did was I cut the holes in my corn hole boards. To do this, I had to use the CNC router. I had to create a file in Fusion, with a 3D designed image from inventor, then program it to cut the hole by design. The hole is 6 inches in diameter, which is standard size for cornhole boards, so the bags you throw can work properly. The images below are the router, cutting the holes in the board tops, and also the final result.
|
|
|
|
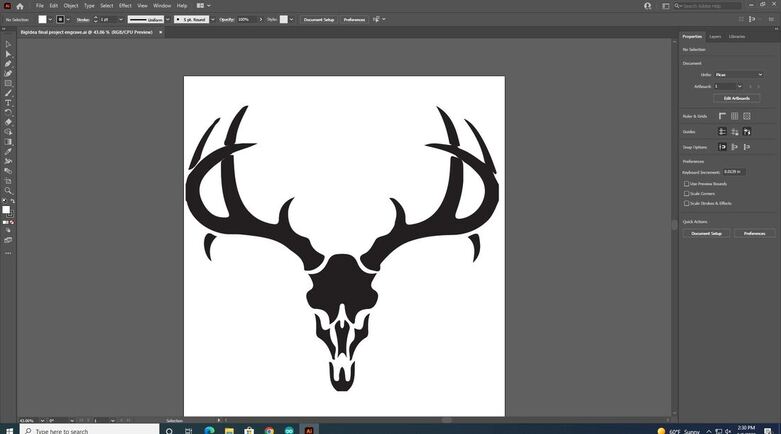
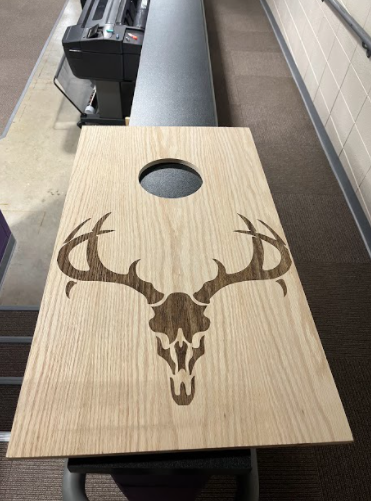
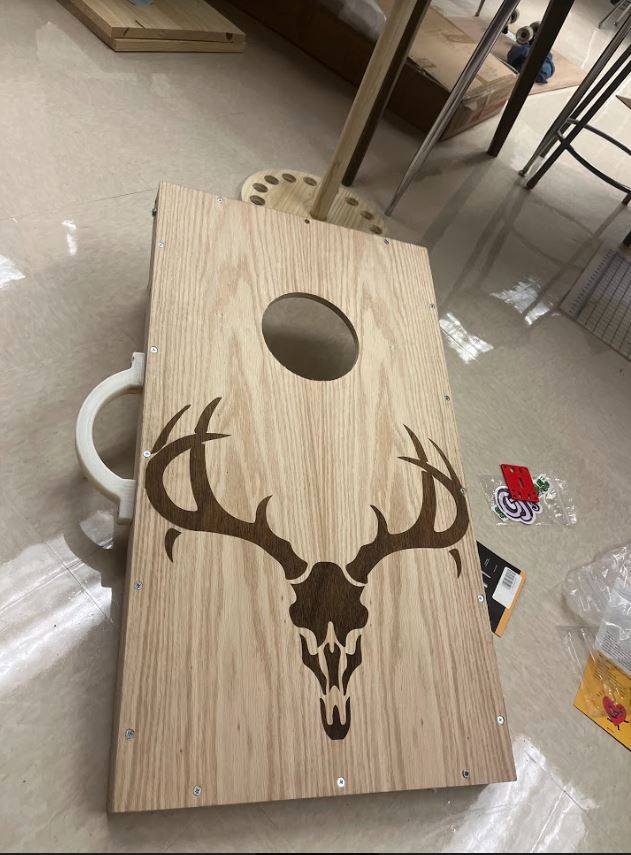
Next, I used Adobe illustrator to create a design that I can engrave onto my corn hole boards. I decided on a image of a whitetail buck skull. I felt like this would fit the vibe, of wooden corn hole boards. A bit outdoorsy.
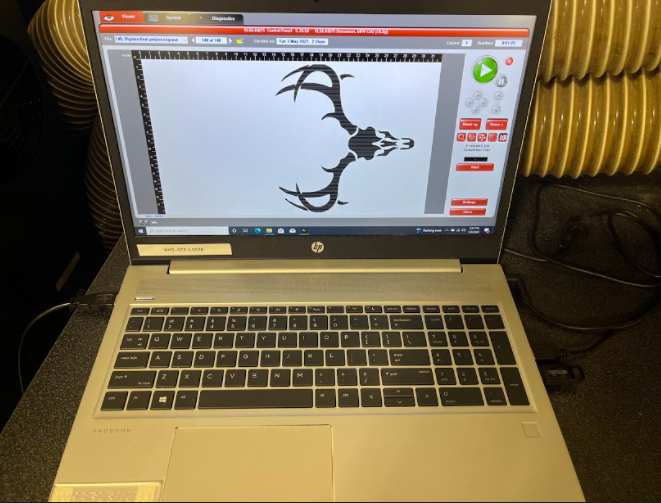
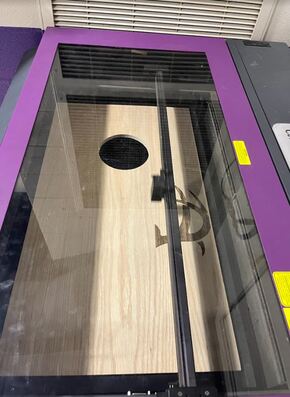
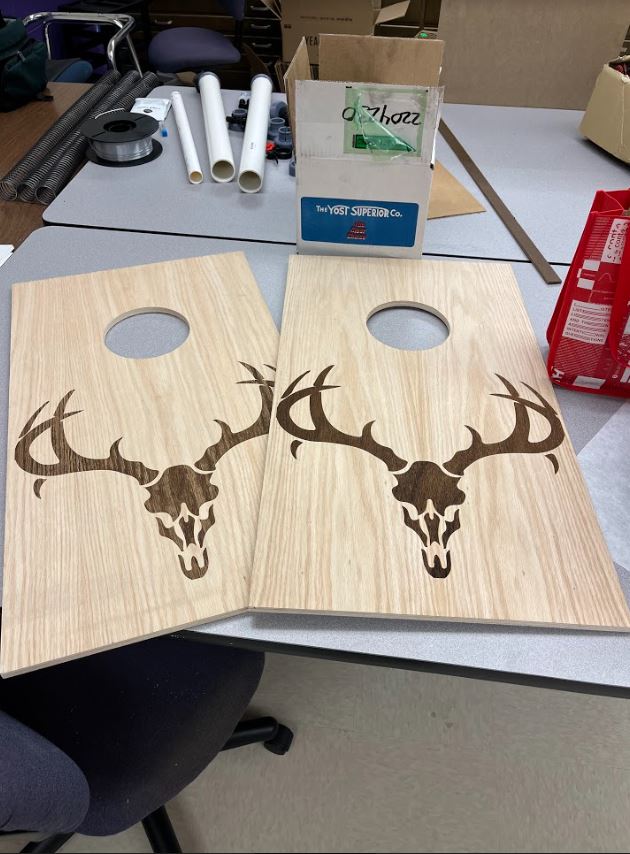
This is the computer showing my design, which will be engraved. I had to rotate the design so it would go the way I wanted to on the boards. The next image shows the laser mid way thru with the engraving process. This design was fairly big, so it took a long time to engrave. Each design took 55 minutes. The final engrave of the deer on both of the boards turned out great.
|
|
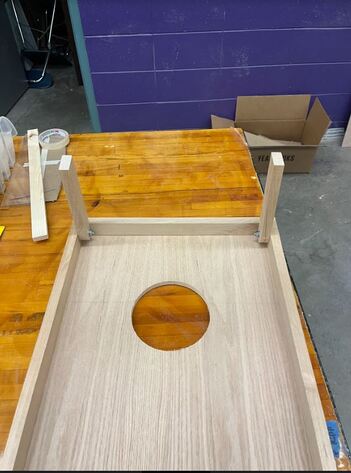
With the base attached to the boards, and the deer engraved to the wood. This is about the midway point for the project, which is starting to look great.
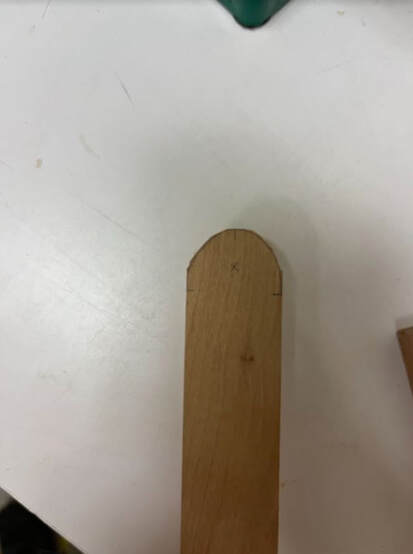
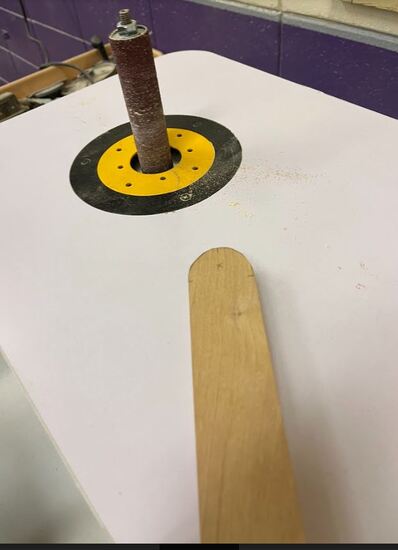
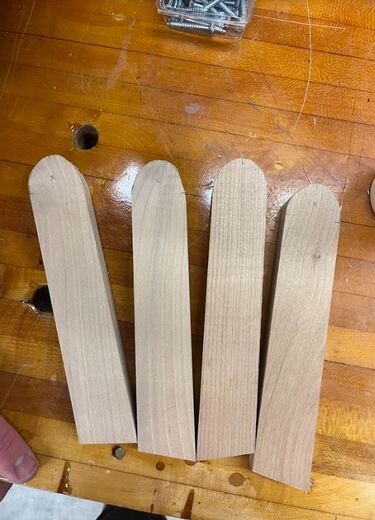
Continuing on, I need to build the legs for the corn hole boards using the extra wood I had. I'm glad I had extra, because I had no time to go shopping again. This wood was originally going to be extra support under my boards, but that wasn't needed, so this was perfect for the legs.
I first cut each board to size, which was 8.5 inches in length. Then had the ends cut, and made the ends rounded by sanding them as seen below. It was difficult to draw a perfect rounded edge by hand, so that took some time. It wasn't perfect, but that were sanding comes in after I cut it. I also had to ensure that the legs had the right angle, so I had to cut a 12 degree angle on the bottom of each leg.
|
|
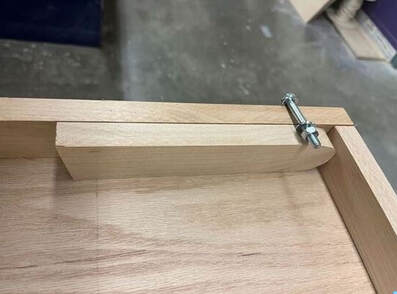
Now that I had 4 legs with rounded edges that could rotate, I can attach them to my boards using 2" long bolts.
This image shows the bolt I used, and how the legs will be orientated. Once I drilled a hole for the bolts, I screwed them in, tightened the bolt, and rotated the legs, that left me with a standing corn hole board. After I screwed some of them in, the rounded edges were not perfect. This means not every leg rotate fully, so I had to continuously keep taking off the legs and keep sanding them until they rotated correctly. That was a bit of a struggle, but I got it done.
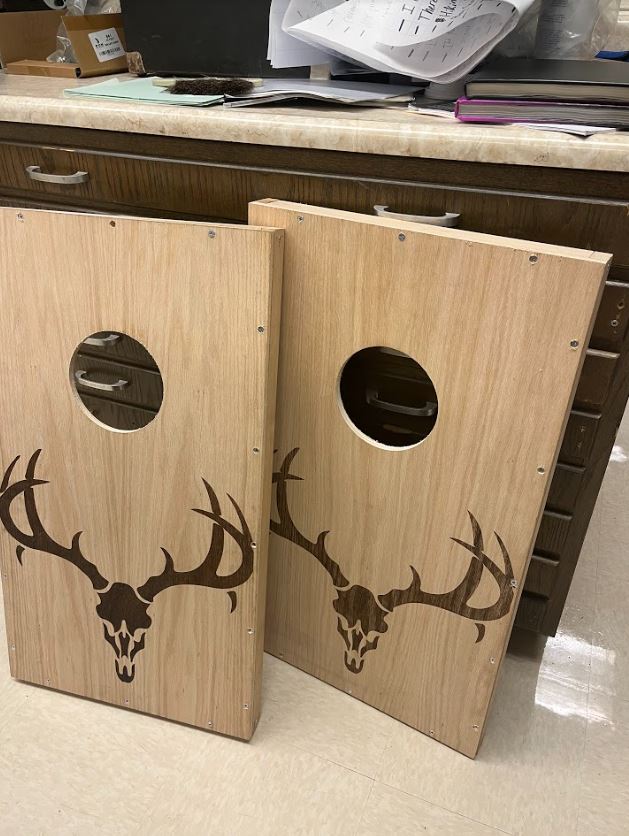
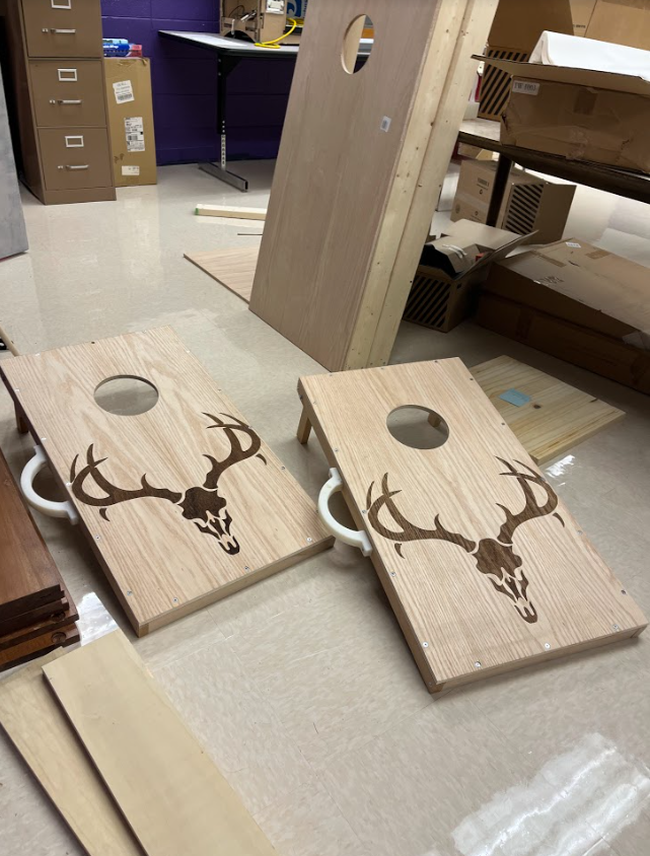
This is how both the corn hole board look, once the legs were attached. One standing, and one showing the legs. They are starting to look like real corn hole boards now.
|
|
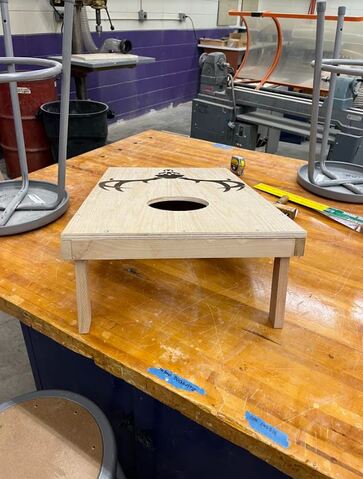
The boards are almost complete, and I only have one thing left to do. Its something that I wanted to do since thinking of this project. Ignore someone's other corn hole board in the back ( ;
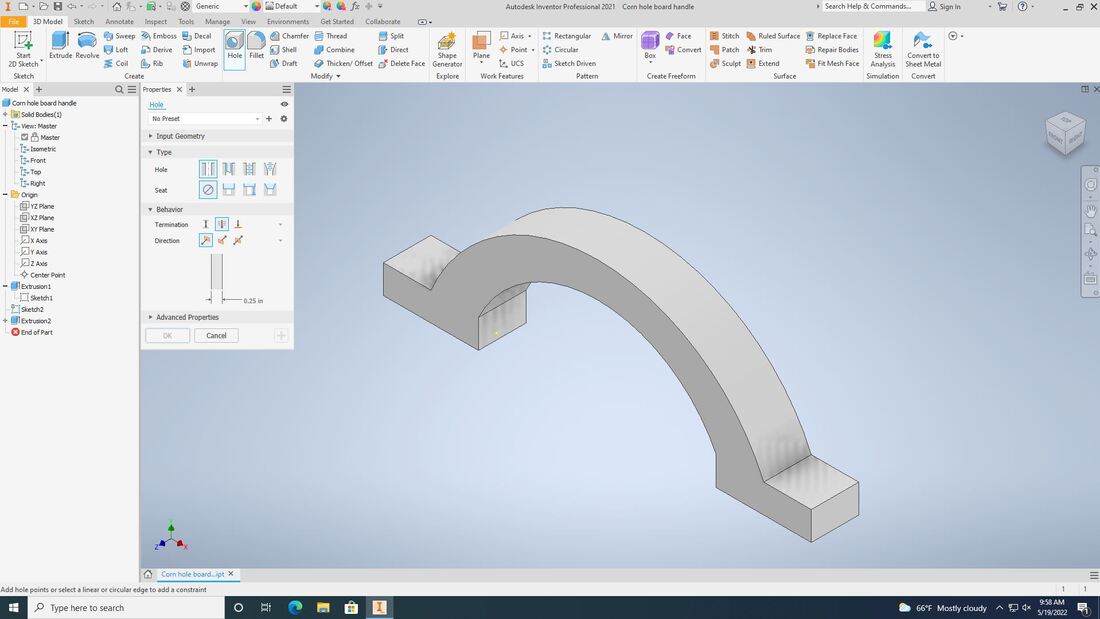
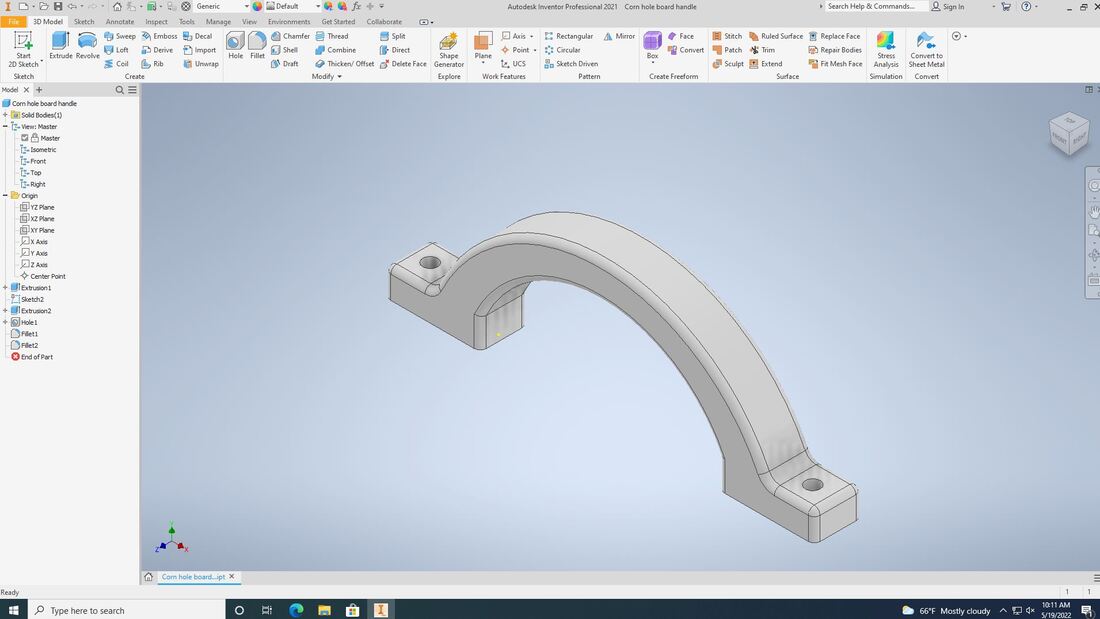
The final thing that I need to complete to use 3 machines in the innovation center is 3D print a handle for the boards. I started off in Inventor to design a handle for the side of the corn hole boards. The image on the left is the basics of my handle, and the image on the right includes the holes for screws and has fillets to make it stronger.
|
|
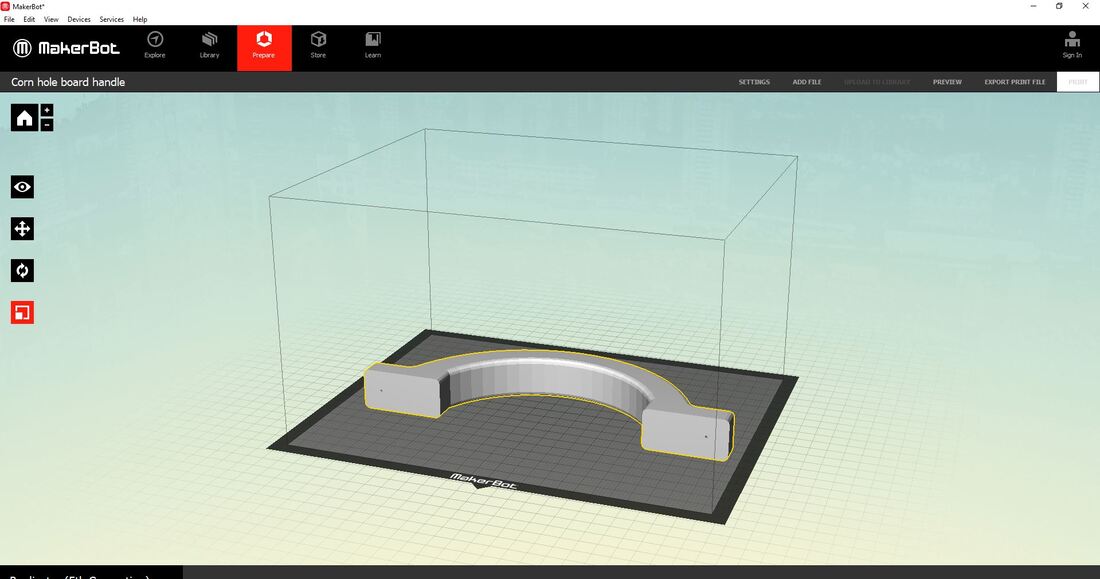
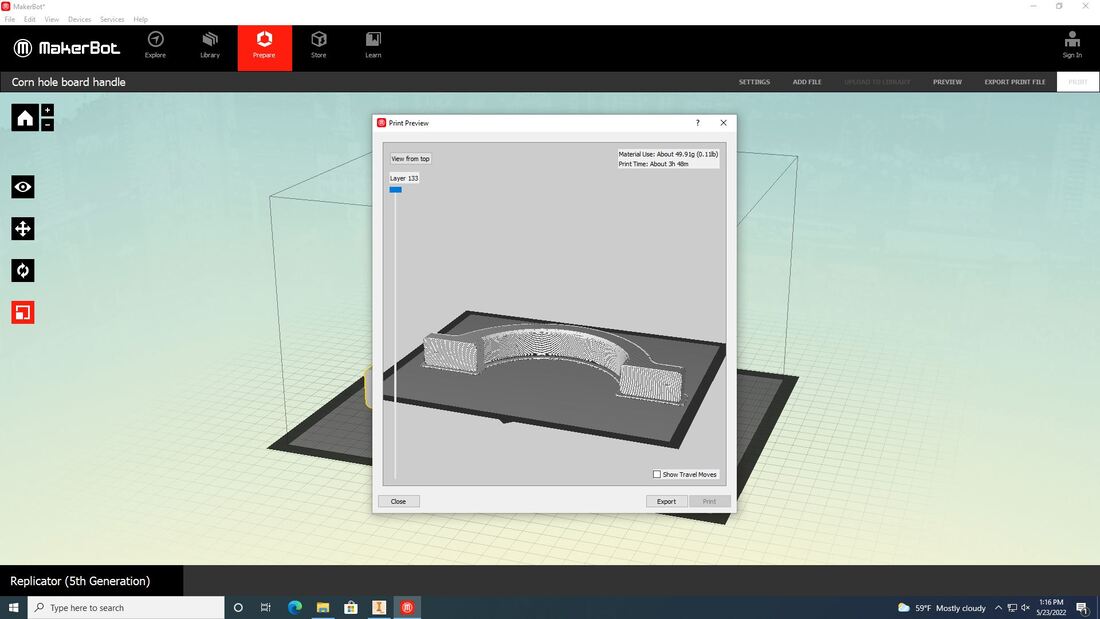
Next I took the file and put it into MakerBot. I laid it flat, and changed some of the settings to make the handle strong enough to be able to carry the weight of the wooden corn hole boards. The print time for this was going to be 8 hours, with the extra setting I changed. Once this is done, I exported the file and took it to a 3D printer in the innovation center.
|
|
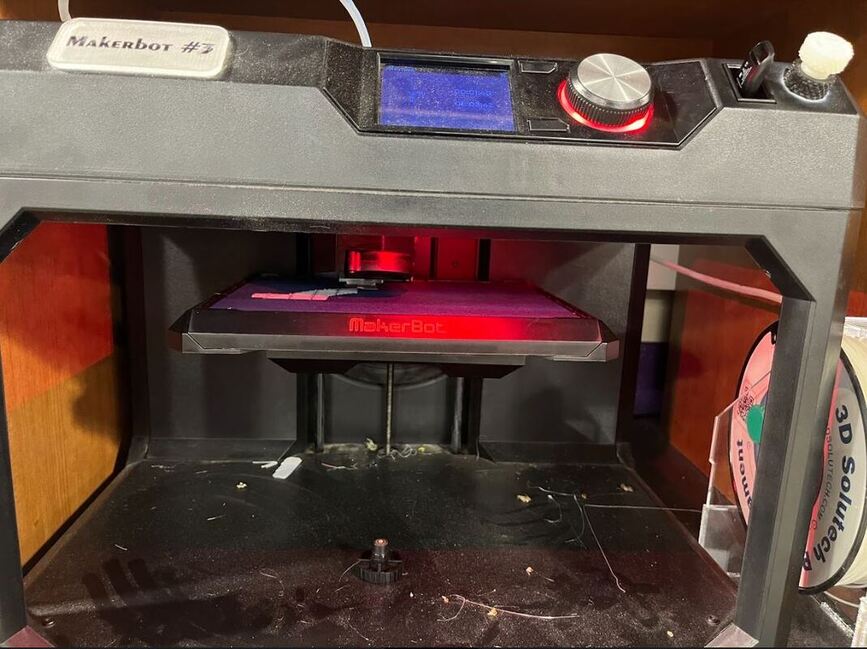
This is my handle starting to get 3D printed on the makerbot printer. 8 hours after this, it will be finished, and Then I need to print one more, in the same way, with the same file, with the same filament so they would match.
Once both the handles printed, I screwed them into my boards. They were the perfect size, and can carry the weight of the boards.
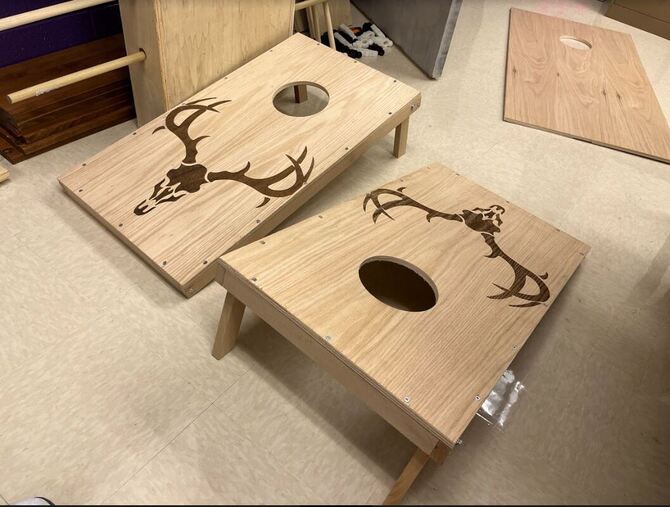
After screwing both of the handles into each of the boards, that means that the corn hole boards are complete! This is my final image of my corn hole boards that I built through this semester.
Conclusion
Overall this semester has been tough for me. I have missed lots of classes because of spring sports, which put me in a time crunch toward the end of the semester. But I put in some extra time by coming in on off days, and working in contact time. The real thing this semester taught me was to have good time management. I worked every class period, and even that didn't seem like enough time to finish all my assignments. But I finished them and that was simply because I put in the work, like doing Arduino at home, and coming in on extra days. But It was a good semester in this class, full of fun, and lots of learning.
